|
Video Denoiser Comparison Comparison of Different Noise Reduction and Removal Solutions Short Version Download as PDF
March 2007 YUVsoft Corporation
Averaging Methods and Explanation of Graphs “Advocate_short_version” Sequence Y-SSIM Video Preprocessing Conclusion Denoiser by “tHE fISH” (Based on Donald Graft’s Code) The following presentation is the short version of a full report. This shorter version contains only a small portion of the analysis data and describes only the main results. To obtain a full version of the report, please contact our general inquiries staff using the e-mail address provided at the YUVsoft website.[1] This report is based on an evaluation of the YUV Denoising technology[2] in comparison with its competitors. To facilitate the presentation of an accurate and unbiased analysis, the YUV Denoising results are omitted from this public report.
Definitions: VD – VirtualDub Plug-in AAE – Adobe After Effects Plug-in
A more detailed description is provided in Appendix B.
The test set mainly includes movies and standard video sequences from various sources that incorporate different types of motion. A more detailed description of the sequences used can be found in Appendix A. The main objective of this report is the presentation of results from an evaluation of several noise removal solutions. This evaluation facilitates the choice of the most effective solution, in terms of speed and quality, for two tasks: video preprocessing for compression and video filtering for visual quality improvement. For both tasks, the denoisers used in the evaluation operated with two variant settings: a default preset and a hard noise (“hard”) preset. (“Hard” refers to the choice of settings for removal of hard noise.) These settings are described in Appendix B. PreprocessingTo compare denoising algorithms as encoding preprocessors, the following steps were taken (Figure 1): · Preprocessing of video sequences using denoising algorithms · Compression of preprocessed video sequences · Decompression of video sequences · Comparison of decompressed video sequences with originals
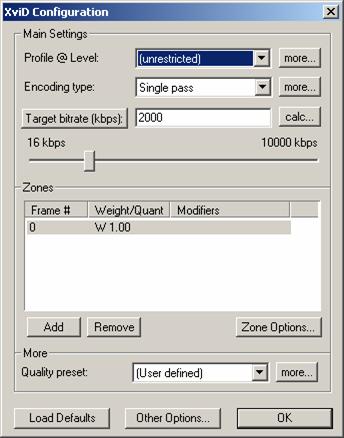
XviD 1.1.2 (build by Koepi Vanilla, November 1, 2006) was used with the following bitrates for the respective video sequences:
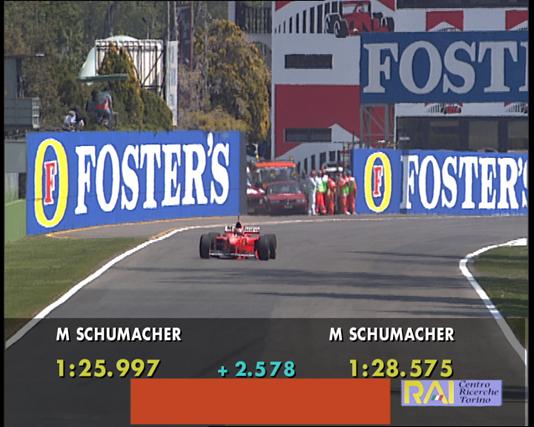
The “Schumacher” sequence was not used for preprocessing tests. More detailed information on the XviD settings can be found in Appendix C. Video FiltrationTo compare the results of denoising algorithm usage for video filtering, near-noiseless video sequences were used and the following steps taken (Figure 2): · Addition of artificial noise to video sequences · Removal of noise from sequences using different denoising algorithms · Comparison of processed sequences with the originals
The “Schumacher” sequence was used for video filtration comparison following the application of different types of noise. The first three variants of noise were generated using the MSU Noise Generator v2.1 plug-in[3] for VirtualDub. The settings are listed below:
Also, a different approach was used to make the noise look more natural: before adding noise, the video was enlarged by a factor of two in every dimension using the internal VirtualDub bicubic resizing filter. Following the addition of noise, the video was scaled down to its original size using the same resizing algorithm. RGB24 color space was used for the first three noise types. The fourth noise type was film grain in YV12 color space. Film grain was generated using the YUVsoft Grain Generator from the YUV Grain-Degrain technology.[4] The Illustrations of all noise types are shown in Figure 3 through Figure 8.
During testing, the following metrics were used: · PSNR (Y component) · SSIM (Y component) · VQM (Y component) A detailed description of these metrics, including the SSIM algorithm, can be found on the Internet at the compression.ru website.[5] The entire analysis discussed in this report was performed using the Y-SSIM and Y-PSNR metrics, which are used as measures of quality. Relative bitrates were calculated using Y-SSIM, as described in section “Averaging Methods and Explanation of Graphs”.
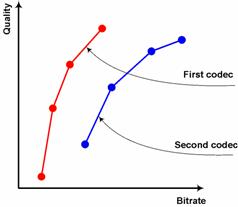
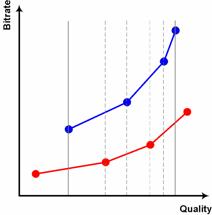
For preprocessing, all presets (default and hard noise) were first run for each sequence at 6 different bitrates: 700, 850, 1000, 1200, 1500 and 2000 kbps (for 4CIF resolution). Encoded sequences were compared with the originals using objective metrics, such as PSNR, SSIM and others. Following this comparison, both bitrate/quality graphs and codec rate-distortion curves were plotted. The first step toward determination of the relative bitrate of two denoisers is “rotation” of the rate-distortion (RD) graphs, thus interchanging the axes of the plot (see Figure 9 and Figure 10). This rotation clarifies the calculation of the ratio of bitrates for the same quality. The advantage of using the bitrate ratio for a particular quality instead of, for example, the PSNR difference for the same bitrate, is that the bitrate ratio is independent of the objective quality metric used in the graphs. It is then necessary to choose an averaging interval. A quality range is chosen in which unknown bitrate values can be interpolated between the nearest neighboring values. This interpolation eliminates the potentially large errors that can result from extrapolation beyond the range of measured values in the RD curves. Linear interpolation is used to calculate values between the existing points. To get average values, the areas under the curves are calculated and then divided one by another (see Figure 11).
To determine the overall relative encoding time for two denoisers, the relative time is calculated for each sequence and the arithmetic mean of these values is evaluated. For each sequence, the total encoding time (time to encode a sequence at each of 6 bitrates) for each codec is divided by the encoding time for the chosen reference codec. This method allows small sequences to be considered with the same weight as long sequences (as opposed to the “total encoding time” characteristic, which gives longer sequences greater weight). Average relative bitrate graphs, which are found throughout this document, are visualizations of the relative speed and the relative bitrate (for the same quality) for all denoisers. One of the denoisers is selected as a reference and is always placed at point (1, 1) in the figures. For each preset, the relative time and relative bitrate are calculated against the reference and placed in the figure.
This short version report presents only a few graphs from the denoiser comparison. The first consideration is denoiser quality for preprocessing; a comparison can be made with the help of RD curves for both types of presets: · Default preset · Preset for hard noise The graphs in this section are organized according to the following format: · “Advocate” sequence o Default preset o Preset for hard noise · “Wendy’s” sequence o Default preset · “Susi” sequence o Default preset
Note: For this version of the report, only Y-SSIM is presented as a quality measure. “Advocate” Sequence Y-SSIM
“Advocate_short_version” Sequence Y-SSIM
For the short version of the “Advocate” sequence, which is a portion of the “Advocate” sequence, the results differ from those of the full sequence. Dynamic Noise Reduction, for example, shows better results, as do some of the other denoisers as well.
“Susi” Sequence Y-SSIM
ConclusionBitrate savings results for Y-SSIM were used to rank the denoisers. The results for only three sequences have been included in this short version report.
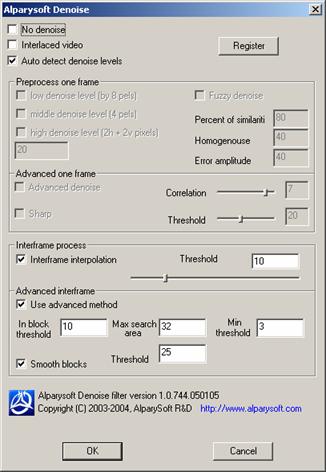
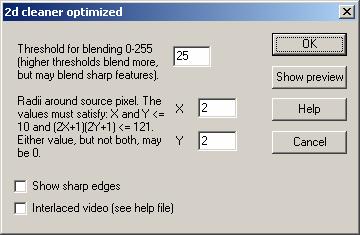
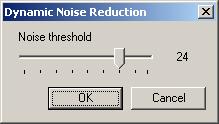
The denoisers tested in this part of the comparison can be ranked as follows when using the default preset: 1. MSU denoiser 2. Neat Video 3. Alparysoft Denoise Filter 4. flaXen VHS Filter 5. Denoiser by “tHE fISH” 6. NRS (Noise Reduction Suite) 7. Smart Smoother 8. 2d cleaner 9. DNR (Dynamic Noise Reduction) 10. Video DeNoise 11. Adobe After Effects internal filter 12. Sapphire GrainRemove (very low result on some sequences) Additionally, it is crucial to note that only the MSU denoiser improves the bitrate savings as compared to XviD without preprocessing. Note: Denoisers have not been ranked for the hard noise preset because of the subjectivity of the choice of settings. Only the MSU denoiser can provide bitrate savings on average for the whole test set using the Y-SSIM metric. Neat Video was a very close second, falling short only for the “Wendy’s” video sequence. Almost all of the denoisers in the test set failed to solve the main task – decrease of the compression bitrate while preserving the quality of the original video. Possible reasons for this failure include the following: · The specific test set may not have allowed for sufficient preprocessing to significantly improve the compression ratio, due to an insufficient number of static scenes in each video. This difficulty can be seen for the short version of the “Advocate” sequence (see “Advocate” in Appendix A. Sequences), where some denoisers, such as Dynamic Noise Reduction, for example, show better results than they do for the full version of this sequence. · The specific denoising parameters may not have been selected accurately for the particular noise type and strength in the video. For the convenience of the reader, Y-PSNR is used here as the default quality metric.
To understand the quality of output images in comparison with that of the original noisy image, the delta Y-PSNR diagram can be considered. Also, to keep the comparison brief, only those denoisers that always increase objective quality relative to the noisy image were evaluated. Default PresetThe graph in Figure 21 shows, for the default preset, only those denoisers that have improved Y-PSNR relative to the noisy video for all types of noise. The best denoisers for the different types of noise can then be ranked:
Preset for Hard NoiseThe preset for hard noise may now be considered. The following graph includes results only for those denoisers that improve the Y-PSNR relative to the noisy video for all types of noise.
The best denoisers can then be ranked for each type of noise:
The following figures facilitate evaluation of the visual quality of various denoising algorithms.
Conclusion· Denoisers that preserve some amount of noise are probably preferable both by visual estimation metrics and by objective metrics. · In some cases, the objective metric correlates strongly with visual estimation, as with the AAE internal grain remover and the Sapphire GrainRemove algorithms, where both low Y-PSNR value and low visual quality are evident. · Sometimes the objective metric does not correlate well with the visual quality. For example, Video DeNoise has a high Y-PSNR value, but it fails to provide good visual quality, as denoising is stronger in the horizontal direction than in the vertical direction. · When estimating the denoising quality for video filtering, it is crucial to use not only objective metrics, but visual comparison as well. Default PresetAccording to the Y-PSNR metric, the best denoisers for video filtering with the default preset are the following: 1. Smart Smoother 2. Neat Video 3. 2d cleaner 4. Video DeNoise 5. NRS 6. VHS 7. MSU denoiser The other denoisers failed to provide quality improvement in each video sequences in the test set, according to the Y-PSNR metric. Preset for Hard NoiseAccording to the objective metric, the best denoisers for video processing using the preset for hard noise are the following: 1. MSU denoiser 2. Neat Video 3. NRS, VHS The other denoisers failed to provide quality improvement in each video sequence in the test set, according to the Y-PSNR metric.
PC configuration: AMD Athlon64 3000+ (2.01 GHz), 1 GB RAM Sequence: “Wendy’s” Processing time:
The following graphs show the speed/quality trade-off for the “Wendy’s” sequence, both for all denoisers as well as for the relatively fast and high-quality denoisers.
· As has been shown, different noise reduction solutions are appropriate for meeting different needs; for the test set used in this report, there was no solution that was best both in preprocessing and in video filtering. · Only the MSU Denoiser could solve the task of decreasing the bitrate while keeping the same visual quality for the test set. Other denoisers failed to perform to this level. · According to the average results, Neat Video provides more stable results for preprocessing and for video filtering than do the other denoisers. On average for the test set, Neat Video showed the best result, but it has a very low processing speed: more than ten times slower than many other solutions. · For video filtering, apparently it is important not to remove all noise, but to preserve some amount for better quality. Also, it is greatly important to detect the noise level of the video, especially for cases of hard noise. · Freeware denoisers often are competitive with commercial noise reduction solutions and sometimes provide the same or better quality with higher processing speed; commercial solutions like Sapphire GrainRemove and Adobe After Effects internal showed lower quality than did freeware solutions like 2d cleaner, VHS, DNR and others. These freeware solutions have higher processing speeds as well.
This sequence is characterized by the presence of film grain, fast motion in relatively small areas and large uniform areas. There are two scene changes: starting from the girl with brush and changing to another actress standing at the other side of the room, then back once again. The girl with the brush makes a few strokes, then turns to the other actress and then back to the wall once more. When the girl with the brush turns away from the wall, the other girl stands almost still. This scene was used for a short version of the sequence. “Wendy’s”
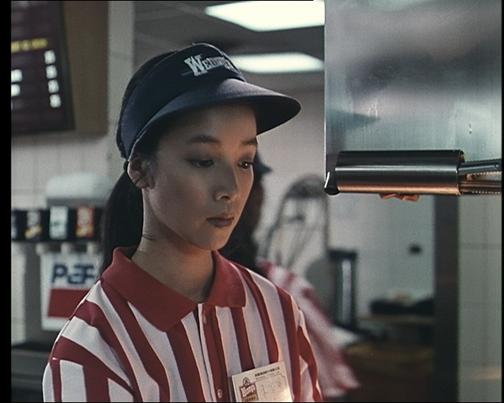
This sequence is characterized by high-level noise and fast motion. The camera moves from the potato chips to the waitress and then follows her. The waitress is serving the order.
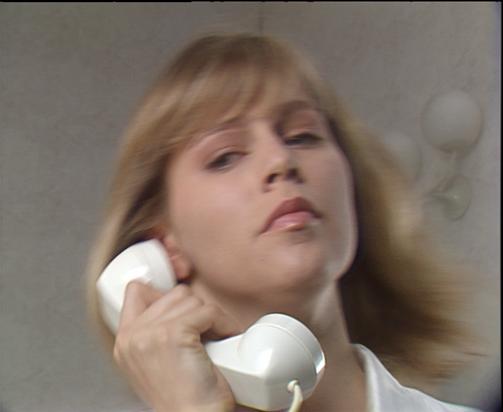
This sequence is characterized by high-level noise and slow motion. During the first part, the scene is almost static (the girl only blinks), then there is significant motion (she abruptly moves her head), followed by the scene becoming almost static once again. Noise is suppressed in every other frame due to the B-frames option in the MPEG-2 codec.
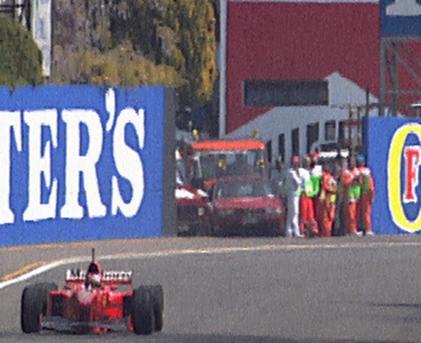
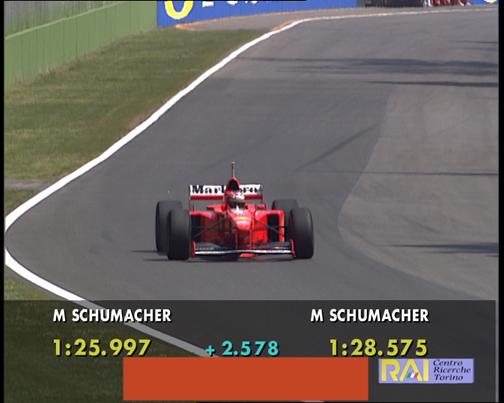
This sequence is characterized by an absence of noise and by relatively slow motion. During the first part of the sequence, the scene shows a slow pan that follows the car moving toward the camera. There is then a scene change, and the car is shown from the side as it moves quickly on the road and then turns toward the camera. The camera tracks the car throughout entire sequence. For all denoisers, only differences in the default preset are shown. · VirtualDub plug-in, VirtualDub 1.6.16 used · Normal and “hard” presets were used
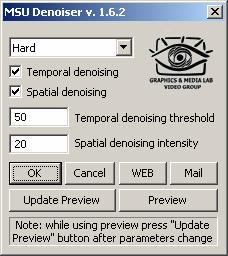
Remarks: · VirtualDub plug-in, VirtualDub 1.6.16 used · Default preset selected arbitrarily (filter required all settings to be user-specified prior to operation) · “Hard” preset selected arbitrarily
Remarks: No remarks. · VirtualDub plug-in, VirtualDub 1.6.16 used · “Hard” preset selected arbitrarily
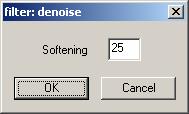
Remarks: No remarks. Denoiser by “tHE fISH” (Based on Donald Graft’s Code)· VirtualDub plug-in, VirtualDub 1.6.16 used · Based on the deflicker source by Donald A. Graft · “Hard” preset selected arbitrarily
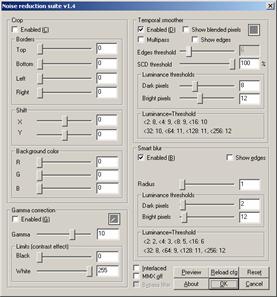
Remarks: No remarks. · VirtualDub plug-in, VirtualDub 1.6.16 used · “Hard” preset selected arbitrarily
Remarks: No remarks. · VirtualDub plug-in, VirtualDub 1.6.16 used · Only default preset tested
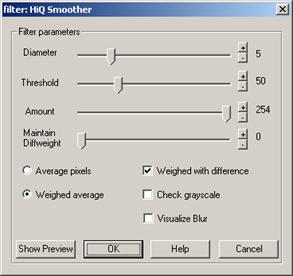
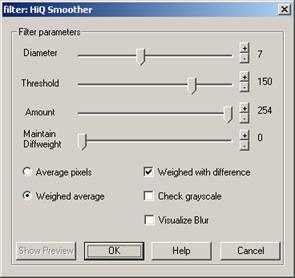
Remarks: There were an abundance of parameters, and it is not clear if some specific combination provides better denoising quality. · VirtualDub plug-in, VirtualDub 1.6.16 used · Based on Smart Smoother v1.1 source by Donald A. Graft · “Hard” preset selected arbitrarily
Remarks: No remarks. · VirtualDub plug-in, VirtualDub 1.6.16 used · Only default preset tested
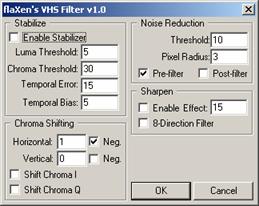
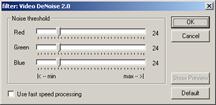
Remarks: No remarks. · VirtualDub plug-in, VirtualDub 1.6.16 used · “Hard” preset selected arbitrarily
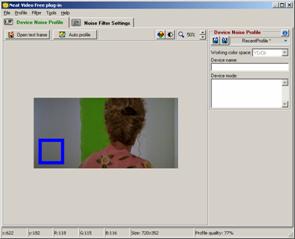
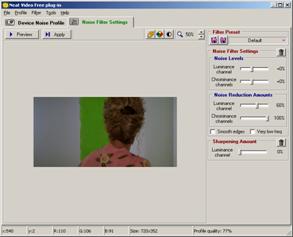
Remarks: Video DeNoise does not support the VirtualDub job mechanism, as it stores its parameters elsewhere, so the processing cannot be performed with a given set of parameters using VirtualDub job. However, jobs can be used when processing all videos with the same settings. · VirtualDub plug-in, VirtualDub 1.6.16 used · “Hard” preset selected arbitrarily
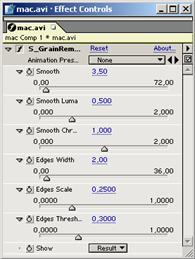
Remarks: There is no opportunity to change profiling zone size, and it is not always possible to find a smooth 60x60 pixel area. Also, if there is a need to use VirtualDub job mechanism, profiles must be stored in different places after autoprofiling. · Adobe After Effects plug-in · “Hard” preset selected arbitrarily
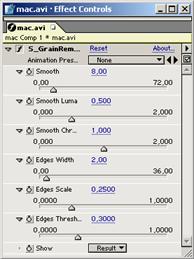
Remarks: Sapphire GrainRemove causes extreme blurring of the image for its default preset, so the “hard” preset was made less rigorous. · Adobe After Effects plug-in · “Hard” preset selected arbitrarily
Remarks: The algorithm has an excessive number of parameters. With the addition of several more parameters, the AAE internal grain remover could serve as a constructor of denoising algorithms rather than an algorithm of its own. Nevertheless, it can be used effectively by professionals. · VFW build of XviD 1.1.2 codec by Koepis Vanilla used · Compression and decompression performed using VirtualDub 1.6.16 video processing program · All default settings used, with exception of bitrate
Remarks: No remarks.
|
|||||||||||||||||||||||||||||||||||||||||||||||||||||||||||||||||||||||||||||||||||||||||||||||||||||||||||||||||||||||||||||||||||||||||||||||||||||||||||||||||||||||||||||||||||||||||||||||||||||||||||||||||||||||||||||||||||||||||||||||||||||||||||||||||||||||||||||||||||||||||||||||||||||||||||||||||||||||||